
Opayo migration v3.0 to v4.0
Overview
The existing SagePay v3 integration has been updated to support the new Opayo v4 integration. This is in order to be compliant with the new 3d secure v2 requirements. As a consequence of these industry changes, Opayo have mandated that developers move away from the v3.00 protocol, even if the changes did not affect the transactions they process.
Notes:
- MOTO (Mail Order Telephone Order) are not subject to 3d secure processing that eCommerce transactions are.
- Stored cards using Opayo/SagePay tokens will now provide additional information, primarily the TokenSwap functionality. TokenSwap means that Instead of storing encrypted card details, card details are swapped for a re-usable token. The token is then available to be used on subsequent payments.
Configuration
Once you have applied the Khaos Control update including the changes, you do not need to change the integration you are using, but you do need to review some settings for each of your credit card integrations. For any existing SagePay/Opayo integrations you will need to review your Credit Card Integration settings:
- Open
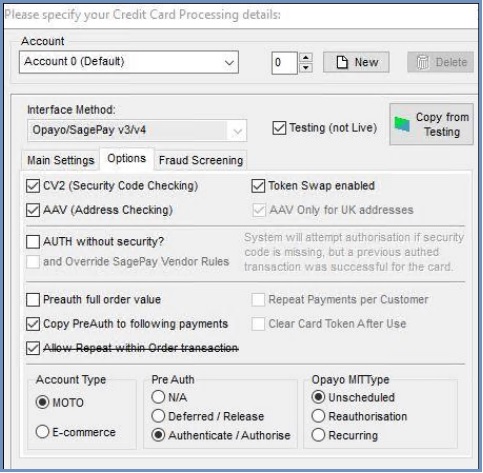
[ System Operations | Edit Credit Card Integration Settings ]. - For each Opayo integration which exists you will need to review its usage and Account Type:
- If you are processing payments using Opayo/SagePay from a website and your back-office system, you will need to ensure you have selected the appropriate Account type for the account being used for the back office and for the web. These should be configured separately even if they feed into the same merchant account within Opayo / SagePay.
- In order to be exempt from the 3D secure processing which is not applicable to MOTO transactions, tick the account type of MOTO on the [ Options ] sub-tab in the card settings dialog.
- If you import transactions from your website, you may need a separate setup for this. Please discuss this with your web developer as they may need to include a separate <ACCOUNT_NUMBER> value in the data they send to Khaos Control.
- The most common outcome will be that your primary CT Account Setting [0] will be for your MOTO transactions and a secondary setup will be required (if you do not already have one) for your web transactions. Most customers already have two setups configured in Khaos Control for this reason.
- If you have any questions surrounding your set up, please email Support.
MITTYPE
For each Opayo integration which is using TokenSwap, the MITType should reviewed, otherwise the default "Unscheduled" will be used. The currently supported options are 'Unscheduled' and 'Reauthorisation'. To change the MITTYPE:
- Open
[ System Operations | Edit Credit Card Integration Settings ]. - Select the Account from the drop down at the top.
- In the bottom right of the Options tab is the Opayo MIIType.
- Select the option you require.
- Continue editing or click OK to close the dialog.
Notes:
- This is only applicable if you are using TokenSwap, as Khaos Control must provide additional information for re-used card information as part of the "Card On File" scheme, mandated by the Credit Card authorities.
- MITYPE is the terminology used by Opayo in their documentation Opayo Migration v3.0 to v4.0 Guide.
Usage
Sales Order
First time using a new card:
- Create the sales order as normal.
- Move to the
[ Sales Order | Payment ]tab. - Tick the Card checkbox in the Payment grid if it is not ticked.
- Click on the
 button in the Payment by Credit Card area.
 - In the Confirm popup click yes to create a new credit card.
- Enter the credit card number.
- Tab to the Expiry field.
- Enter the Expiry date from the credit card.
- Tab to the Sig Digit field and enter the sig digit, the three-digit CV2 number.
- Press Ctrl+S or click
 to save.
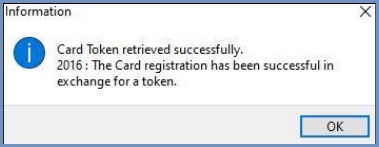
 - A popup appears to confirm that a token has been successfully created:
- Ctrl+ Shift+O or right click and select Authorise Credit Card, to authorise the payment.
Note: you can also pre-authorise the card at this point and then authorise it in[ Sales Invoice Manager | Authorise Payment ], see How To: Release a deferred payment.
This card can now be used for subsequent payments upon each authorisation.
Customer Statement Screen
For first-time use of New Card from Customer Statement Screen:
- Open a Customer screen.
- Open the
[ Customer/Supplier | Detail | Statement ]tab. - Right-click on the 'Allocate From (Credit Notes, Payments)' grid, found in the top-right section of the statement tab.
- Select 'New Payment' from the right-click context menu.
- Select Card Payment Type.
- Enter Payment Amount.
- Click on the
 button.
 - Click on the
 button.
 - Enter the card details:
- Card Number.
- Expiry Date.
- CSC number.
- Click OK, a popup appears to confirm that a token has been successfully created:
This card can now be used for subsequent payments upon each authorisation.