
Send to Notepad
Contents
What is Send to Notepad
Send to Notepad allows the user to send all or only selected data in the Grid to Notepad for saving to external files, printing or importing into a spreadsheet program. The user can select the location to save the file as well as change the file name.
Print / Export grid user permission
To prevent unauthorised printing or exporting of grids:
- Open a System Data screen.
- Double click on
[ System Data | Others | Users ]. - Select the user, right click and select 'Edit User Permissions' from the context menu.
- Un-tick the 'Print/export grid' check-box.
- Click 'OK'.
Note: this is a global option and users can either print or export information from all grids or not.
Benefits of Send to Notepad
Users can select the columns that are to be exported. The information that is exported can either be the selected information or the whole grid. The information contained in a grid can be exported using Send to Notepad, for example:
- Stock takes in the
[ Stock | Adjustments ]tab. This information can imported into a spreadsheet and then used to create stock take sheets for different people or areas of the warehouse. - Sales Orders in the
[ Sales Orders | List ]tab to compare sales information. - Reports in the
[ Sales Summary ]screens to allow users to compare figures in a spreadsheet and create charts for use in presentations.
Where is Send to Notepad?
Send to Notepad is accessed by clicking on the ![]() button found to the left of grid column headings and selecting
button found to the left of grid column headings and selecting [ Send to Notepad ] from the options.
Send to Notepad Popup
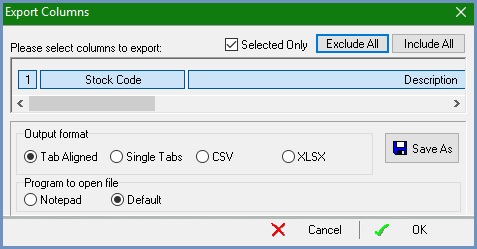
The Send to Notepad popup contains:
- Selected Only checkbox: only visible if items have been green selected in the grid before selecting the Send to Notepad option. Allows the user to base the results on green-selected items or all items in the grid.
 button: allows the user to exclude all column headings and therefore column information, from being exported.
 button: allows the user to include all column headings and therefore column information, to be exported.
Note: when the Send to Notepad popup is first opened all the column headings are included.- Column headings: these will depend on the grid that is being exported.
- Output format: allows the user to select from the below list, the format that the file is output in.
- Tab Aligned: produces a notepad file which has all of the entries aligned by tabs. This is generally used for viewing the file in notepad only.
- Single Tabs: produces a notepad file which has the entries on the file separated by single tabs, allowing the user to select the contents and easily "copy & paste" them into a spreadsheet for viewing.
- Comma Separated: produces a file which separates the values in the file by comma's producing a file which can be saved as a .csv file. Once saved as a .csv file, this file can also be opened in a spreadsheet.
- XLS: produces a file that be saved as a .xls file, and view as a spreadsheet.
 : allows the user to export the information to a specified location by clicking on the
  where the user can also change the text file name:
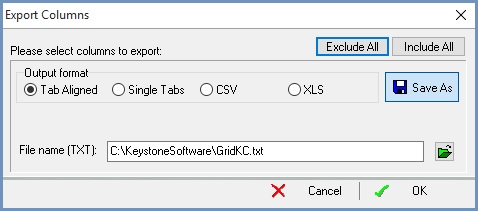
Examples of Send to Notepad
Export to CSV
- Ensure the grid contains the data you wish to export.
- In the grid, green-select the cells you want to copy (e.g. by holding down the Ctrl + left-clicking in the rows you want to select or Ctrl + A to select the entire grid).

- Click on the small drop down arrow at the top left of the grid
 to display the drop-down grid menu.
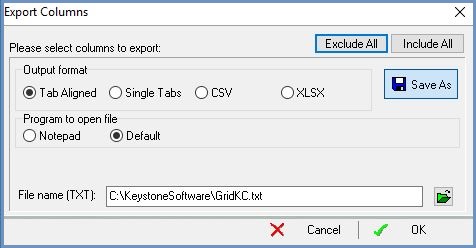
 - Select 'Send to Notepad' from the options to open the 'Export Columns' dialog box:
- By default, all columns from the grid are included in the export. To select a subset of the columns, follow these instructions:
- Pressing the button turns off all columns, preventing them being exported (notice how the column names in the dialog box turn dark when they are excluded from the export).
- Pressing the button turns on all columns, including them in the export.
- Clicking on the names of individuals columns toggles them between the excluded (darker coloured background) and included (lighter coloured background) state. The horizontal scroll bar that appears immediately below the column names allows the column names to be moved left and right:
- Pressing the
- Select the following options in the 'Export Columns' popup:
- Press the "CSV" (comma-seperated values) radio button to set the output format.
- Click the icon. This changes an area of the dialog box, allowing you to set the output folder and filename:
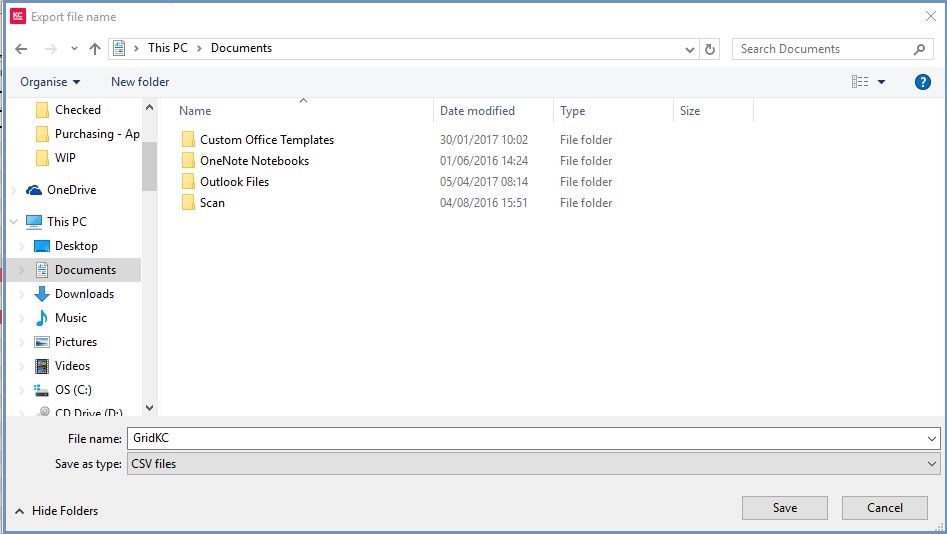
- Click the green open folder button to open Microsoft's "Save As" dialog.
- Navigate to the folder where you wish to save the file.
- Enter a file name (e.g.
110128_Output_for_analysis.csv). - Click the "Save" button to close this dialog:
- In Khaos Control's 'Export Columns' dialog, click "OK" to save the file.
- The
GridKC.csvfile should then open automatically in Microsoft Notepad, with the data you have exported showing. Here is an example using data from our training system. Notice how the headings and columns do not always line up; this is because each column is separated from the next by a single tab character: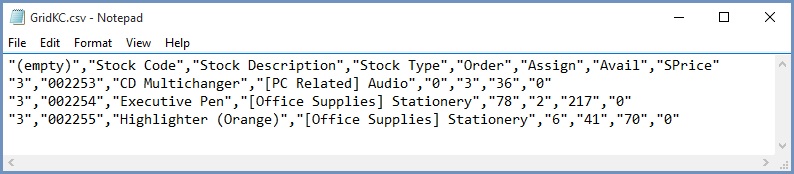
Notes
- When sending to Notepad, it is important to ensure Notepad does not have 'Word Wrap' enabled (Edit, Word Wrap) or the Grid will not display correctly.
- When importing into a spreadsheet package, such as MS Excel, it is important to specify each column to be separated by a TAB delimiter and that Excel should 'Treat consecutive delimiters as one'.