How To: Move stock between locations using Legacy HHTs
- Log on to the HHT interface.
- Enter the user's password.
- Press Enter or click on the Login button.
Note: you can setup user badges with the user's password as a barcode which they can then scan instead of having to type in their password. For more information visit How To: Create barcodes to login Users into the HHT - Click on the
 button.
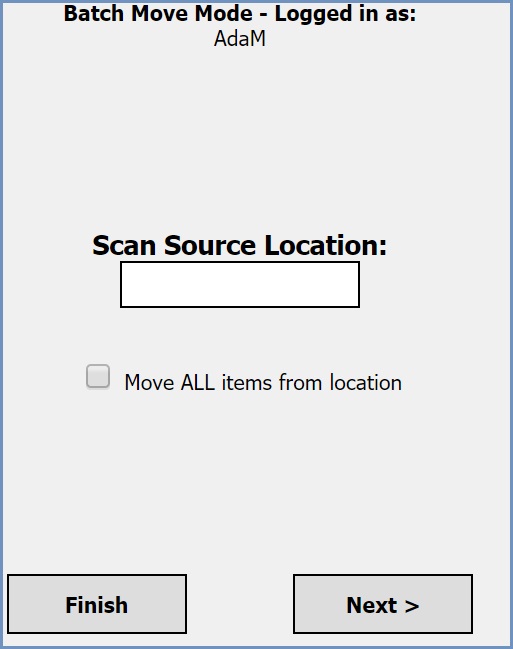
 - Scan the Source Location (where the items are currently stored). (See Scan Source Location screen image below)
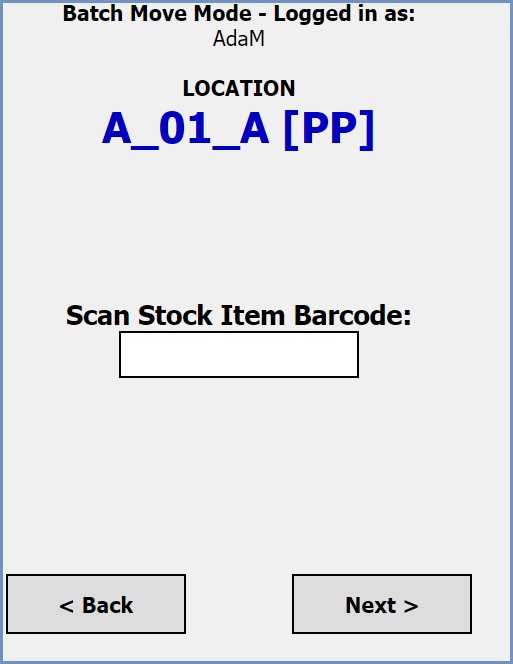
- Scan the stock item to be moved. (See Scan Stock Item screen image below)
Note: If you want to move all stock from the source location simultaneously, tick the Move all items from location checkbox (Optional)
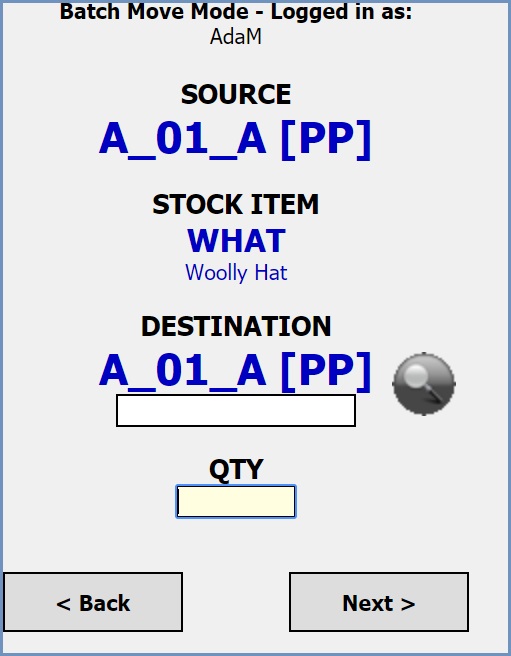
 - Scan Location to move the items to.
Note: the HHT will suggest a location to move the stock to, if you wish to manually find a location press the button to display the Manual Location Select area. If the location is not present tick the Include Zero Location checkbox and all locations that can hold the stock item are displayed.
 - Confirm the quantity to be moved (or select all). (See Scan Qty screen image below)
- Repeat as required or finish.
Notes:
- Once the process on the HHT is finished, a batch movement will be created and processed in Khaos Control that records the stock movements against the user and updates the stock items and locations in Khaos Control.
- This process will always start on the HHT and there will be no admin part to this process within Khaos Control, either with users creating batch moves to be processed, or in confirming batch moves before they are processed on Khaos Control once the HHT has finished.
Images
Scan Source Location screen

Scan Stock Item screen

Scan Qty screen

