How To: Build Stock Items using Warehouse Control
| | Warehouse Location Control is an Advanced User feature. It contains complex, resource-intensive functionality and a decision to begin using it should therefore not be taken lightly. |
Build items are constructed from other stock items. By default no automatic stock movements occur when build items are added to sales orders as the quantity built via the relationships tab affects the stock level. You also need to tell the system where you want to store the finished build items.
The parent build item must be built in order to create stock to sell.
- Click
 and in the popup enter how many items you have build.
 - Click on 'OK'.
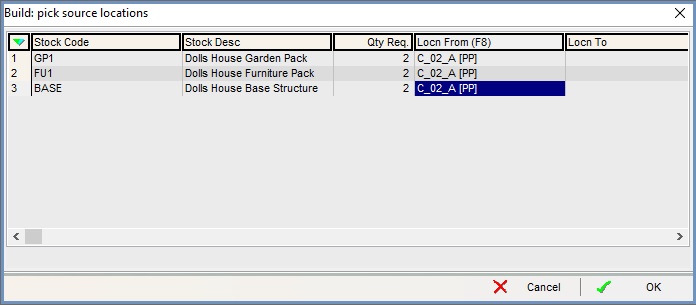
- In the Build pick source locations dialog focus in the 'Locn (F8)' column for the first child item.

- Press F8.
- Double click on the location the child items are to be taken from.
- Repeat for all the child items, then press 'OK'.
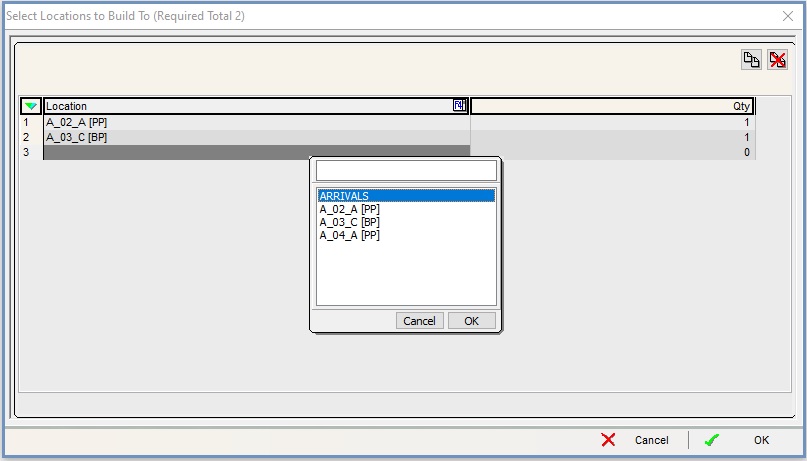
- In the Select Locations to Build To (Required Total #) dialog:

- Click
 or press F3 to add a new item.
 - In the Location column press F4.
- From the list of locations the build parent can be stored in, select the one you wish to store the finished build items in.
- Enter the quantity to store in the location.
- Repeat if you wish to store the build items over several locations.
- Click OK.
- Click
- In the Confirm popup press 'Yes' to print the build report.
- The Stock item will be build from all the components and placed in the warehouse location highest pick priority and lowest alpha-numerical designation.
Note:
- If using Warehouse Jobs, a separate stock build job will be created for each of the locations and should be processed as normal.
- See How To: Create Build Stock Items using Warehouse Control to create build items.
- The Auto Build option in
[ System Values | Stock ]works with warehouse control functionality and places the parent item in ARRIVALS.
