
How To: Add Various Settings when Configuring Basic Reports
Contents
- 1 Quantity Field display Blank not 0
- 2 Date Formats
- 3 Have a PO Reorder multiple display as full amount
- 4 Taking out backorder stock code/desc etc from the report
- 5 Change and add colours to shapes
- 6 Ensure a line stays with the stock item line
- 7 Adding Boxes and Weights to Reports
- 8 Adding Weights
- 9 Headers and Footers
- 10 Displaying Options, for example Locations, in Alphabetical Order
- 11 Company Name not showing on Reports
- 12 Logos
- 13 Wrapping Stock Codes and Descriptions
- 14 Adding extra addresses or an email/contact number etc
- 15 Making sure Child Items aren't shown on Sales Order Acknowledgement and Pick Ticket
- 16 Adding a 2D Barcode
- 17 Working on below
| | Basic Reports Setup is an Advanced User feature. |
Quantity Field display Blank not 0
When displaying '0' in a quantity field and you would like this to show as blank:
- Right Click on the Qty field.
- Select DisplayFormat.
- In the DisplayFormat property of the Qty field, set:
#;-#;; - Click OK.
Date Formats
- Right Click on the date field.
- Select DisplayFormat.
- Set the date as:
- For '12 October 2022' as dd mmmm yyyy, or
- For 'Friday 14 October 2022' as dddd dd/mmmm/yyyy
- Click OK.
Include time on a report
- Right Click on the date field.
- Select DisplayFormat.
- Set the date as dddd dd/mm/yyyy hh:nn
- Click OK.
Have a PO Reorder multiple display as full amount
For reorder multiples, if you want to display 10 instead of 1x10:
- Select the Qty field.
- The Data Pipeline dropdown in the top right will be DBDetails.
- In the adjacent Data Field drop down, change the qty to Real_Qty_Bought
Taking out backorder stock code/desc etc from the report
- Open the report.
- In the Report Settings checkboxes tick the Exclude To Follow Items checkbox.
- Continue to edit the report as required.
Change and add colours to shapes
- Open the report in Design view.
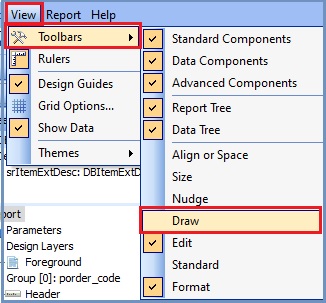
- Click on View at the top of the screen.
- Select Toolbars.
- Tick the Draw toolbar.
A paint tin will appear on the toolbar from which you can load the MS Paint toolbars so you can select multiple colours or enter the RGB colour codes and define how light or dark the colour is.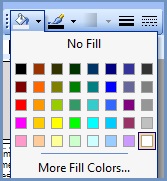 .
.

Note: Not every object can be coloured.
Ensure a line stays with the stock item line
To add a space in a report, you can use a region.
- Open the report in Design view.
- Click on the
 button on the Advanced Component toolbar.
Note: if you can't see the toolbar, click on View at the top of the screen, then Toolbars and select Advanced Components. - Click on the area of the report where you want the region to be located.
- Using the handles adjust the region to the desired size.
- Untick the Visible checkbox.
- Add a line under the region: (Optional)
- Click on the
 button.
 - Click in the report under the region.
- Resize as required.
- Tick the StretchWithParent checkbox.
- Tick the ParentHeight checkbox.
- Tick the ParentWidth checkbox.
- Click on the
- Continue editing as required or save your changes.
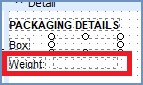
Adding Boxes and Weights to Reports
Add a DBText field for the calculation for the box and weights: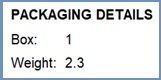
Adding a Box
- Open the report in Design view.
- Click on the
 button.
 - Place the field in the location on the report and use the handles to resize as required.
- In DBBase select calc_inv_box_count.
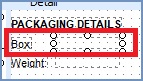
- Add a label as per the diagram by clicking on the
 button.
Adding Weights
There are two weights that can be added to your report from the [ Stock | Detail | Properties ]screen; Average and Postage Weights: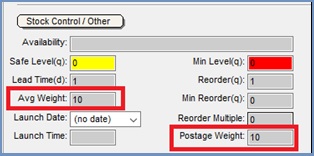
Adding the Average Weight
- Click on the button.
- Place the field in the location on the report and use the handles to resize as required.
- In DBBase select calc_total_weight.
- Add a label as per the diagram by clicking on the button.
Adding the Postage Weight
- Click on the button.
- Place the field in the location on the report and use the handles to resize as required.
- In DBBase select calc_inv_box_weight.
- Add a label as per the diagram by clicking on the button.
Go to Report on the Menu bar at the top and select Header or Footer as required:
You can then add fields to the header and/or footer area as required.
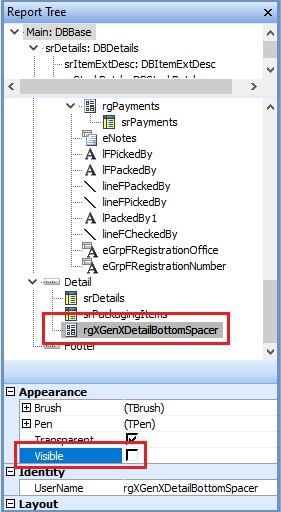
This will move the footer details so it always stays under the last stock item in the list instead of lots of white space.
In the Report Tree:
- Focus on the rgXGenXDetailBottomSpacer.
- Untick the Visible checkbox (see below).
Displaying Options, for example Locations, in Alphabetical Order
- Open the report and ensure you have the correct brand selected.
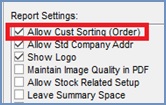
- Tick the Allow Cust Sorting (Order) checkbox.
- Click on the
 button which will be activated on the right of the dialog.
 - In the Sort Order dialog:
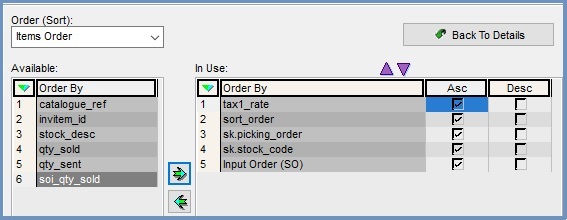
- Select the type of items to be sorted, e.g. Items Order, Documents Order etc.
- The Available items that can be ordered will appear.
- Focus on the option you wish to order by and click the green arrow to add it to the In Use grid on the right.
- Tick the Asc (Ascending) or Desc (Descending) checkboxes as required.
- Move the hierarchy of the options as required by using the purple up and down arrows above the grid.
- Click on the Back to Details button when finished.
Company Name not showing on Reports
If the company name is not showing on reports:
- Open a Sales Order screen.
- Open
[ Sales Order | Detail | Addresses ]tab. - Press Alt+E or click
 to enter edit mode.
 - Tick the Name checkboxes to the right of Invoice Address and Delivery Address.
- Press Ctrl+S or click
 to save or continue to edit the sales order
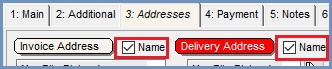
Logos
Logos are stored in the following places in the system:
-
[ System Values | General | Logon and Printouts ]the main company default logo. -
[ System | Data | Sales Order Processing | Branding ]for logos used when a document is for a specific brand. -
[ System Data | Sales Order Processing | Sales Source ]for invoices linked to a sales source.
| |
|
|---|
Display Logo
If you wish to display a logo on a document then the Show Logo checkbox must be ticked in Report Settings: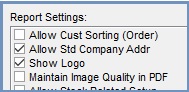
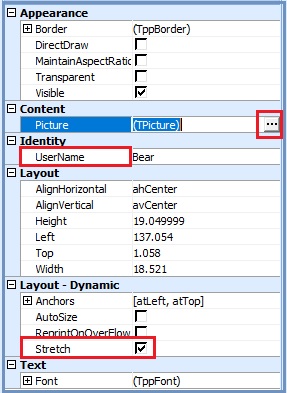
To add a new Logo
- In Basic Reports Design view, click on the Image button on the top toolbar:

- Place the image in the report and resize as required.
- Click on the Picture option and then on the ellipsis. You can then locate the file path of the logo image.
Note: If using branding you don't need the file path as the system will know where to find the logo. - Change the UserName to the name of the logo.
- Tick the Stretch checkbox.
- Save the report as normal.
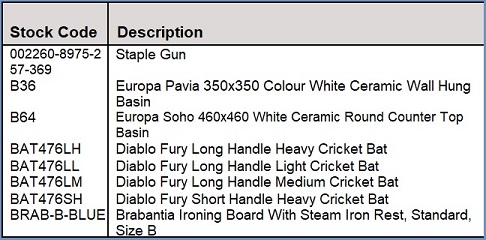
Wrapping Stock Codes and Descriptions
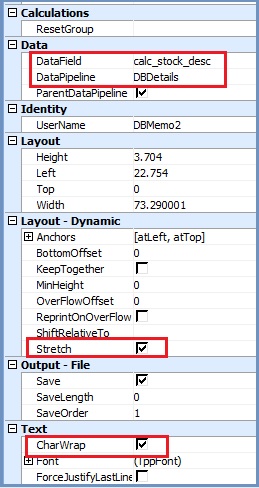
If you have long stock codes or descriptions these can be wrapped, i.e. displayed over more than one line in your reports.
- Click on the
 DBMemo button on the menu.
 - Place the DBMemo object in the report and resize and position as required.
- In the DBDetails pipeline, select stock_code for stock codes or cal_stock_desc for stock descriptions.
- Tick the CharWrap checkbox.
- Tick the Stretch checkbox.
- Continue editing as required.
Adding extra addresses or an email/contact number etc
Editing Addresses
In the addresses area, double click to edit. In the following image the non-editable group is on the left, the editable address group is on the right: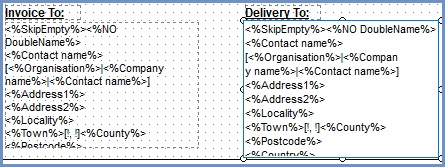
- <%br%> add a line break to add the information onto the next line.
Mandatory Address Tags
The following tags are mandatory:
- <%SkipEmpty%> if there is nothing to display a tag will be skipped.
- <%NO DoubleName%> if the names are the same, e.g. company, contact, organisation, then the system will skip them when using this tag.
Changing the colour or format of a section of an Address
- Add a
 Memo field and place it into the group.
 - Add the fields which can then be formatted e.g. bold, red etc.
Which Address to Use?
You define which address type to use from the ![]() button, see Basic Reports Setup - Address Type.
button, see Basic Reports Setup - Address Type.
Notes:
- The name of the field e.g. eEmailAddress must match exactly.
- You need to select where this should be pulled from e.g. Invoice/Delivery.
- If there is only one field required such as email/tel, ensure that the Custom checkbox is ticked.
- This must be setup for all brands and fields e.g. Compnay Name, Tel etc.
Making sure Child Items aren't shown on Sales Order Acknowledgement and Pick Ticket
All items within DBDetails needs to be in a region as seen below: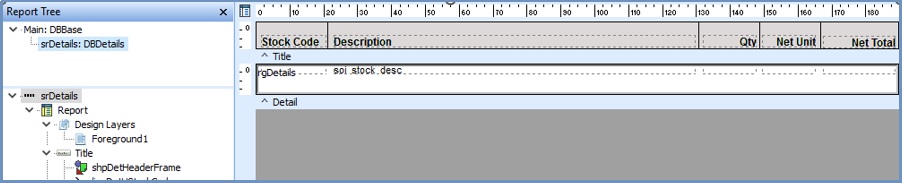
A condition then needs to be made using the region and the parentstock_id which needs to be <> 0:
Adding a 2D Barcode
2D barcodes can be added to documents and also labels as follows:
- Open the document or label in design view making sure you have selected the correct brand if using.
- Click on the
 button.
 - Place the object and position and resize using the handles as required.
- From DBDetails, select stock_code or stock_other_ref as what will be displayed as the 2D barcode.
You can further define stock labels as per below.
Adding the 2D Barcode to a Stock Label
When adding the 2D barcode to a label, you can define the type of barcode as setup in [ System Data | Stock | Barcode Type ] and then configured using the ![]() button in the
button in the [ Stock | Detail | Properties ] screen. This is done using the ![]() button.
button.
Working on below
Rotate Fields for Reports and Labels
You can rotate certain fields so that they display at an angle.
Rotate in Reports
- In Design view select the field you wish to change the angle for.
- Tick the Angle checkbox.
- Enter the number of degrees you wish to rotate the field, e.g.
- To turn to the left, you will need to make this 90.
- To turn to the right, this will need to be 270.
- If you would like it upside down, this will need to be 180.
- To turn to the right, this will need to be 270.
- To turn to the left, you will need to make this 90.
Notes:
- This will work on most fields, however, this does not work for Memo and Images on reports.
- WordWrap doesn't work when using Angles.
Rotate in Labels
- In Design view setup the field you wish to rotate.
- Give it a UserName.
- Set up the rest of the options including the pipeline if needed.
- Close Design view.
- Click on the
 button.
 - Click on the
 button.
 - Add a Report Component Name, this is the UserName as entered at step 2 above.
- Select the Direction:
- rdNone
- rdLeft
- rdRight
- rdUpsideDown
Notes:
- When using Basic Label Report Setup, Memo and Images can be rotated.
- WordWrap doesn't work when using Angles.
Moving Stock to Follow
If you want stock to follow away from the stock description, you have to ensure that the ShiftRelativeTo, does not have anything in there:
You also need to ensure that the Show Stock Info Inline is unticked:
Payments
Payment information not pulling through to invoice
When using a Custom's invoice, and the payment information is not pulling through to the printout, ensure that:
- The Use Customs Inv in
[ System Data | International | Countries ]is ticketed for the relevant countries. - The Show Payments checkbox is ticked in the Basic Reports dialog.
Payment Type or Currencies as Written Values
In the report, add however many labels you require. In the example below, we have 3 labels overlapping each other so that they are all in the same area. These are called Cash, Account and Card: In the conditions, you will need to add the conditions as below: To find the PTYPE_ID, you can go into reports and find this within SQL. You will need to match the ID to the description. (select * from sorder_payment_type). For currencies, you do exactly the same but write the currencies you require such as Pound Sterling, Euro, US Dollars etc:
Again, you can find the currency ID through SQL and then enter these within the conditions: