
Emailing Customers about the status of their Back Orders
Table Of Contents
Contents
Emailing customers about their back orders
Emailing is a useful tool for keeping your customers informed about the status of their orders, from letting them know when items have shipped to letting them know that some items may be delivered late. The examples below are for emailing customers to let them know that their back order items will be delivered within the next three weeks.
What are the benefits of emailing your customers about their back order status?
- Keeps the customer informed about their order taking longer than originally anticipated.
- Emails can be sent to groups of customers all waiting for the same item on back order.
- Stops the customer ringing in to ask about their order.
- Helps reduce cancellation rates.
- Displays good customer service.
- The customer has confidence in your company and therefore is more likely to order again from you in the future.
- It's free - no postage required!
Examples of setting up the Message Templates
Below are two message template examples; one is generic and the second details the items that have not yet been sent to the customer.
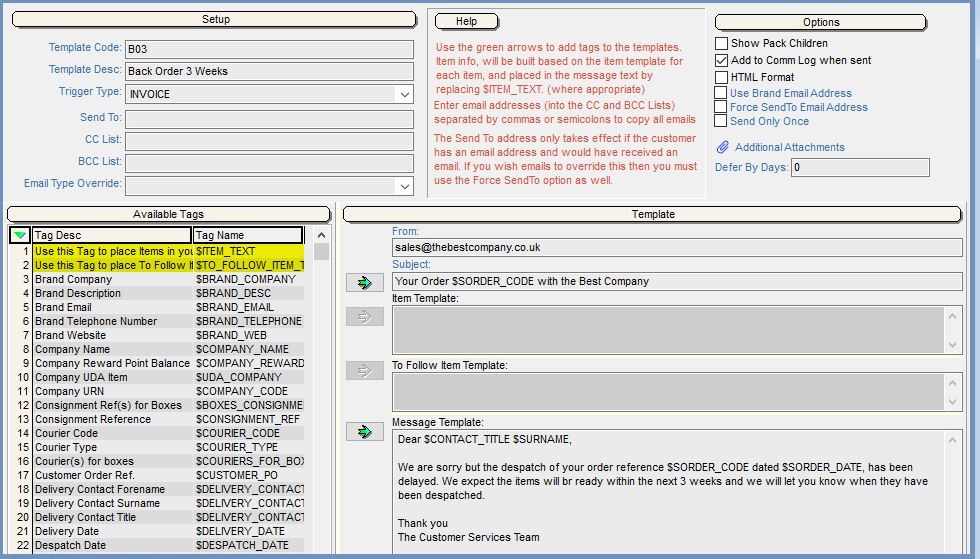
Generic Message Template
The following example is for items that will be available to send to the customer within the next three weeks, however it does not specify the items the customer is waiting for.
- Open an Email Manager screen.
- Click on the Templates radio button.
- Press Ctrl+N or click
 .
. - Add a template code 'BO3'.
- Add a template description 'Back Order 3 Weeks'.
- Select a trigger type of INVOICE.
- Tick the 'Add to Comm Log when sent' checkbox.
- Add the from address, for example sales@thebestcompany.co.uk.
- Add the heading 'Your order $SORDER_CODE with the Best Company'.
Note: to add the tags:- Place the insertion point where you wish to add the tag in the subject line, remembering to add spaces.
- Focus on the tag in the Available Tags area.
- Press the upper
 button next to the Subject field.
- Add the body of the email in the Message Template area, see the example below.
- Press Ctrl+S or click
 to save.
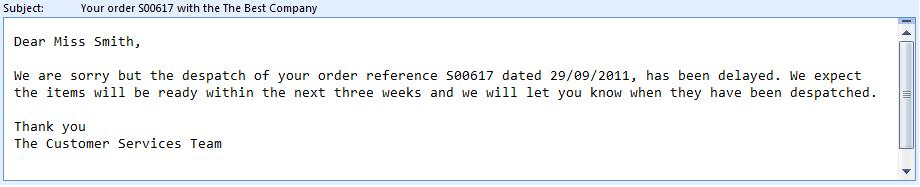
Resulting generic email
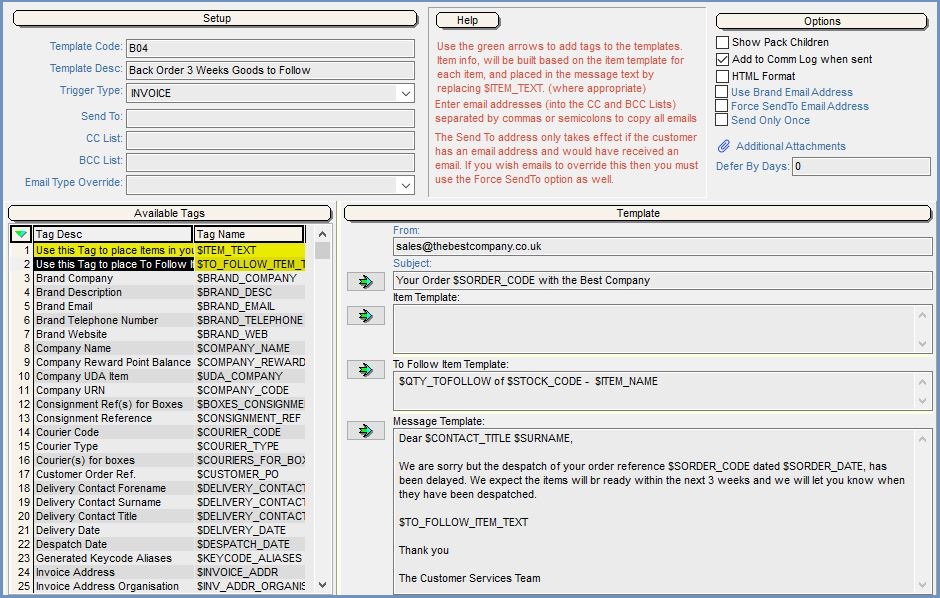
Message Template with the Items To Follow
The following example is for items that will be available to send to the customer within the next three weeks and details the items that the customer is still waiting for.
- Open an Email Manager screen.
- Click on the Templates radio button.
- Press Ctrl+N or click .
- Add a template code 'BO3'.
- Add a template description 'Back Order 3 Weeks'.
- Select a trigger type of INVOICE.
- Tick the 'Add to Comm Log when sent' checkbox.
- Add the from address, for example sales@thebestcompany.co.uk.
- Add the heading 'Your order $SORDER_CODE with the Best Company'.
Note: to add the tags:- Place the insertion point where you wish the tag to appear in the subject line.
- Focus on the tag in the Available Tags area.
- Press the upper button next to the Subject field.
- Build up the To Follow Item Template, in the example below it is '$QTY_TOFOLLOW of $STOCK_CODE - $ITEM_NAME'.
- Add the body of the email in the Message Template area, see the example below and include the yellow tag '$TO_FOLLOW_ITEM_TEXT'.
- Press Ctrl+S or click to save.
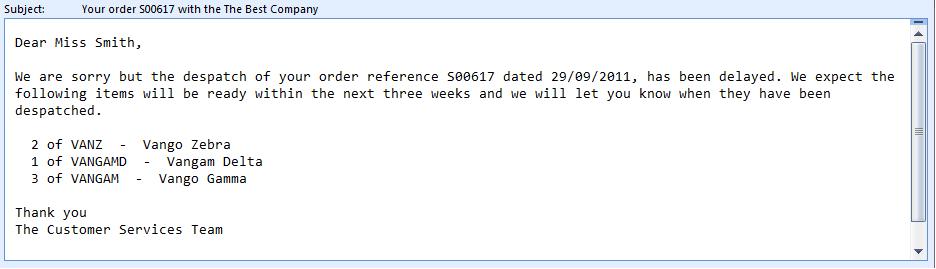
Resulting items to follow email
Examples of using the back order Message Templates
Groups of orders waiting for a specific item
- Open a Sales Invoice Manager screen.
- Go to the Future - Awaiting Stock stage.
- Click on the
 filter button (F4 button).
 - Click on the Stock Code
 button and find and load the stock item that is on back order.
 - Turn the traffic light filter from
 to
to  .
. - Focus in the grid and press Ctrl+A to select all orders.
- Right-click and from the context menu select 'Email => Email (Template) [Selection].
- Select the BO3 (Back Order 3 Weeks) template from the popup list.
- Click on OK.
The emails will be held in Pending emails and will need to be manually sent out from the system.
- Open an Email Manager screen.
- Click on the Go button to populate the grid.
Note: to edit an email before it is sent, double click on it to open it in the Email Editor. After editing it can be sent immediately by ticking the checkbox in the bottom left of the popup. - Focus on BO3 in the Template column.
- Press Ctrl+ Shift+R to select all emails with the BO3 template.
- Right-click and from the context menu select 'Send Selected Emails'.
- Click on 'Yes' in the Confirm popup.
Emailing older orders
- Open a Sales Invoice Manager screen.
- Go to the Future - Awaiting Stock stage.
- Click on the filter button (F4 button).
- Change the delivery date so the oldest orders will be displayed.
- Turn the traffic light filter from to .
- Focus in the grid and press Ctrl+A to select all orders.
- Right-click and from the context menu select 'Email => Email (Template) [Selection].
- Select the BO3 (Back Order 3 Weeks) template from the popup list.
- Click on OK.
The emails will be held in Pending emails and will need to be manually sent out from the system.
- Open an Email Manager screen.
- Click on the Go button to populate the grid.
Note: to edit an email before it is sent, double click on it to open it in the Email Editor. After editing it can be sent immediately by ticking the checkbox in the bottom left of the popup. - Focus on BO3 in the Template column.
- Press Ctrl+ Shift+R to select all emails with the BO3 template.
- Right-click and from the context menu select 'Send Selected Emails'.
- Click on 'Yes' in the Confirm popup.