How To: Configure Amazon Logistics
| | Configuring Amazon Buy Shipping is an Advanced User feature. |
Amazon Logistics enables UK local and regional delivery companies to deliver Amazon and non-Amazon parcels to customers seven days a week. Khaos Control has been modified to include an integration with Amazon Logistics, which can be used in order to acquire and set Delivery information against Sales Orders, such as Courier Services and Shipping Rates.
Overview
In Khaos Control, for any Courier Services mapped to a type of 'Amazon Logistics', the system will contact the Amazon Logistics API in order to acquire Shipping service and rate information. It will use this information to update the invoice associated with the Sales Order with the appropriate shipping service and shipping rate.
Once a Shipping Service and Rate has been obtained from Amazon using the Logistics API, the invoice associated with the Sales Order will be updated with the Courier Service information which has been retrieved. Khaos Control will match against the 'Courier Code' when updating invoices with Courier Service information retrieved from the Amazon Logistics API. Any Courier Services for which details will be returned by the API will need to be created as separate services within [ System Data | Couriers ] .
The system uses the existing [ System Data | Couriers ] and [ System Data | Channel Courier Mapping ] functionality to achieve this,
Notes:
- When requesting a list of available services for a Sales Order from Amazon Logistics, if there are multiple services available for a Sales Order, Khaos Control will choose the service with the lowest Rate.
- Where a Courier Code cannot be matched using the response information from the Amazon Logistics API, the Courier Service against the invoice for the Sales Order will not be populated.
KSS Options
KSS options must be configured for Amazon Logistics to work.
- Click on
[ System Operations ]on the file menu at the top of the screen. - In the Option File Tree select the File in bold.
- In the Sections pane, select the section [ CourierExport ].
- In the Values panel on the right:
- AmzLog_DatePathFormat=YYYYMM (this is date format for file name tag $DATE)
- AmzLog_LabelDir=$APP\CourierExport\AmzLog\Labels\$DATE (Where the label files should be saved to)
- AmzLog_LabelPrintDirect=-1 (0 is default, should the label be printed directly to the printer or just saved)
- AmzLog_LabelPrinterName= (which printer should be used for direct printing - for png files only!)
- Click OK to close the dialog.
System Data - Couriers
- Open a System Data screen.
- Open the
[ System Data | Couriers ]screen. - Press Alt+E or click
 to enter edit mode.
 - Press F3 or click
 to add a new item.
 - Add a new courier service:
- ExportType: Amazon Logistics.
- Add an appropriate Code and "Service / Courier Name".
- Right click on this courier and select "Configure ".
Note:- It is VERY important the courier is fully set up, Amazon rejects requests which it considers to be incomplete.
- Dimensions MUST be set here, for example if Amazon allow you to ship up to 42 x 36 x 34 you would enter the values as 41.99 x 35.99 x 33.99 because this has to be a decimal value.
- Amazon is very data sensitive. Valid Sender Address details should be specified.
- The fields which can be left empty are:
- Sender Address 2.
- PDF Print Command (for printing PDFs if label is returned as PDF).
Courier Mapping
- Open a System Data screen.
- Open the
[ System Data | Channel Courier Mapping ]screen. - Press Alt+E or click to enter edit mode.
- Press F3 or click to add a new item.
- Set up mappings for couriers chosen by Amazon, they will send you a pdf of the details. These are setup in the Channel Courier column and are one of the following:
- Standard
- Expedited
- NextDay
- SecondDay
Note: these values can be found by opening the .cmp file sent from Amazon containing the Sales Order. This will have a <COURIER_DESC>. This value can be mapped to a Channel and Courier (set above) such that orders imported from Amazon, matching this Channel and Courier_Desc will have the Courier assigned to the Sales Order.
- Set 'Is Prime' as appropriate.
- Press Ctrl+S or click
 to save.
MustArriveByDate
- Open a System Data screen.
- Open the
[ System Data | Couriers ]screen. - Press Alt+E or click to enter edit mode.
- Setup the couriers as per the instructions above.
- Right click on the courier and select Configure.
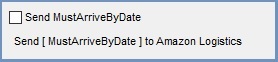
- Update the Send MustArriveByDate as appropriate.
- Press Ctrl+S or click to save.
Note: to have more available services returned when using the Amazon Logistics courier, in particular for shipping to Wales, Scotland and Ireland, Amazon Technical Onboarding Support have advised not specifying the MustArriveByDate when calling GetEligibleShippingServices, therefore this option should be turned off.